The amazing things you can acheive with paint !

Join me for an inside view of a painters world, a world filled with people, places, color and design. My painting company is a perfect platform to show you all the amazing things you can achieve with paint. There will be photo's, stories and DIY tips. From time to time I will throw in some of my art work.
Array of color inc specializes in interior, exterior painting and faux finishes. Our services areas are Indian River Cnty, St. Lucie, Martin and Palm Beach Counties. Call for a free estimate - 772-528-6365
Showing posts with label texture. Show all posts

Saturday, May 4, 2013

Metallic painted accent wall


The inspiration to add this metallic painted accent wall came from the small blue grey pillow and bluish color on the bed cover pattern. Originally the walls were a coral color but it was time for a change. The metallic paint, Benjamin Moore # PT-300 Pearlescent tint was applied over Benjamin Moore # HC-148 flat latex using a three inch brush and short random strokes. If you haven't used metallic paint before, it is very transparent and works great if it is applied over a similar tone. Another tip to make this user friendly is to apply it with a sea sponge, crosshatch brush strokes or rag technique. If you decide to roll the metallic paint, roll in short random directions. Using various faux techniques will create an interesting and beautiful pattern filled with texture that plays with the light.

Check out, sponge painting with metallic paint http://arrayofcolorinc.blogspot.com/2013/03/sponging-with-metalic-paint.html

Wednesday, March 27, 2013

Texture your walls


Looking for adding more dimension to your walls?
Knockdown texture unpainted 
Add texture to your walls and transform them with these tips. This is a larger knock down pattern which can be applied to the walls or ceilings.
If your thinking of adding texture to a previously painted area, prime first and when fully dry apply the texture.
Photo below shows various sizes of wall compound, they were applied with the side of a 6 inch compound blade.

The compound has very little height around 3/8 of an inch, the pattern separation is about an inch. The actual size of the dollops are 1/2 in. to 2 inches.
If needed apply small areas of compound to keep the spacing some what continuous. The trick to a great finish is to keep the pattern consistent.

Texture application
 Next step, hold your 6 inch blade at an 15 to 20 degree angle at the top and glide the blade down the wall pressing the compound down.
Wipe your blade off before each pass.
Continue to the next area and repeat the same movement with the blade until all raised compound has been flattened.
Let the compound dry, take the blade and knock off any points that may be left.
Prime the wall and when dry, its time for panting.

Note: I recommend practicing this technique on a board before applying it to your walls.
Check out my link on faux glazing over texture  -http://arrayofcolorinc.blogspot.com/2013/03/warm-faux-glaze-over-textured-wall.html


Friday, March 1, 2013

Faux concrete block

 Faux concrete block

This faux technique is very versatile, it can be used in many decors, colors and dimensions.
The faux blocks were designed to be distressed for this project, but can be made to fit your imagination.

Be prepared to do a lot of work to complete this project, but the rewards are gratifying. Up to two people to complete this project and various skills are required.

Start with several colors which are in the same family, in this case we used earth tones. The base will be a light color and the blocks will be glazed with the darker colors. The blocks in this photo were 6 x 12 in. The wall was mapped out using a 4 ft level. Each block was taped off with 1 in. blue tape, then the entire wall was skim coated with compound. A slight texture was given to the wall using a compound blade and more compound. Once the compound dried the tape was removed and the wall was primed. The wall was then painted with a coat of eggshell finish with the lighter color.

 Note: When removing the tape the block edges will be chipped. This is good if your looking for a distressed look. If you would like a smooth edge to the blocks the tape will have to be removed before the compound dies.

After the base coat is fully dried the first glaze ( med. color ) is applied with a sea sponge. Use the sea sponge as if your washing the wall. The second glaze ( darker color ) will be used randomly and also applied with a sea sponge. The glaze mixture is 1 part glaze to 1 part paint.  Let the glaze fall into the texture to create character for each block.  Keep the blocks from becoming the same color, mix them up.  If you find that a few blocks are to much the same repaint the base coat in that area and re-glaze.

We added a warmer glaze randomly to keep it interesting. Finally, the grout lines were re-painted with the base color using a small brush. I recommend using a practice board to apply the compound to create a texture that your satisfied with before applying it to your walls. Enjoy!

See more you can do with this project at this link
http://arrayofcolorinc.blogspot.com/2013/03/distressed-faux-block-wall.html


Sunday, October 2, 2011

Drywall repair


click on photo's to enlarge
  Drywall repair

As you can see there is a wall repair which has to much texture and it does not match the surrounding area.  Let's see what else we will find.
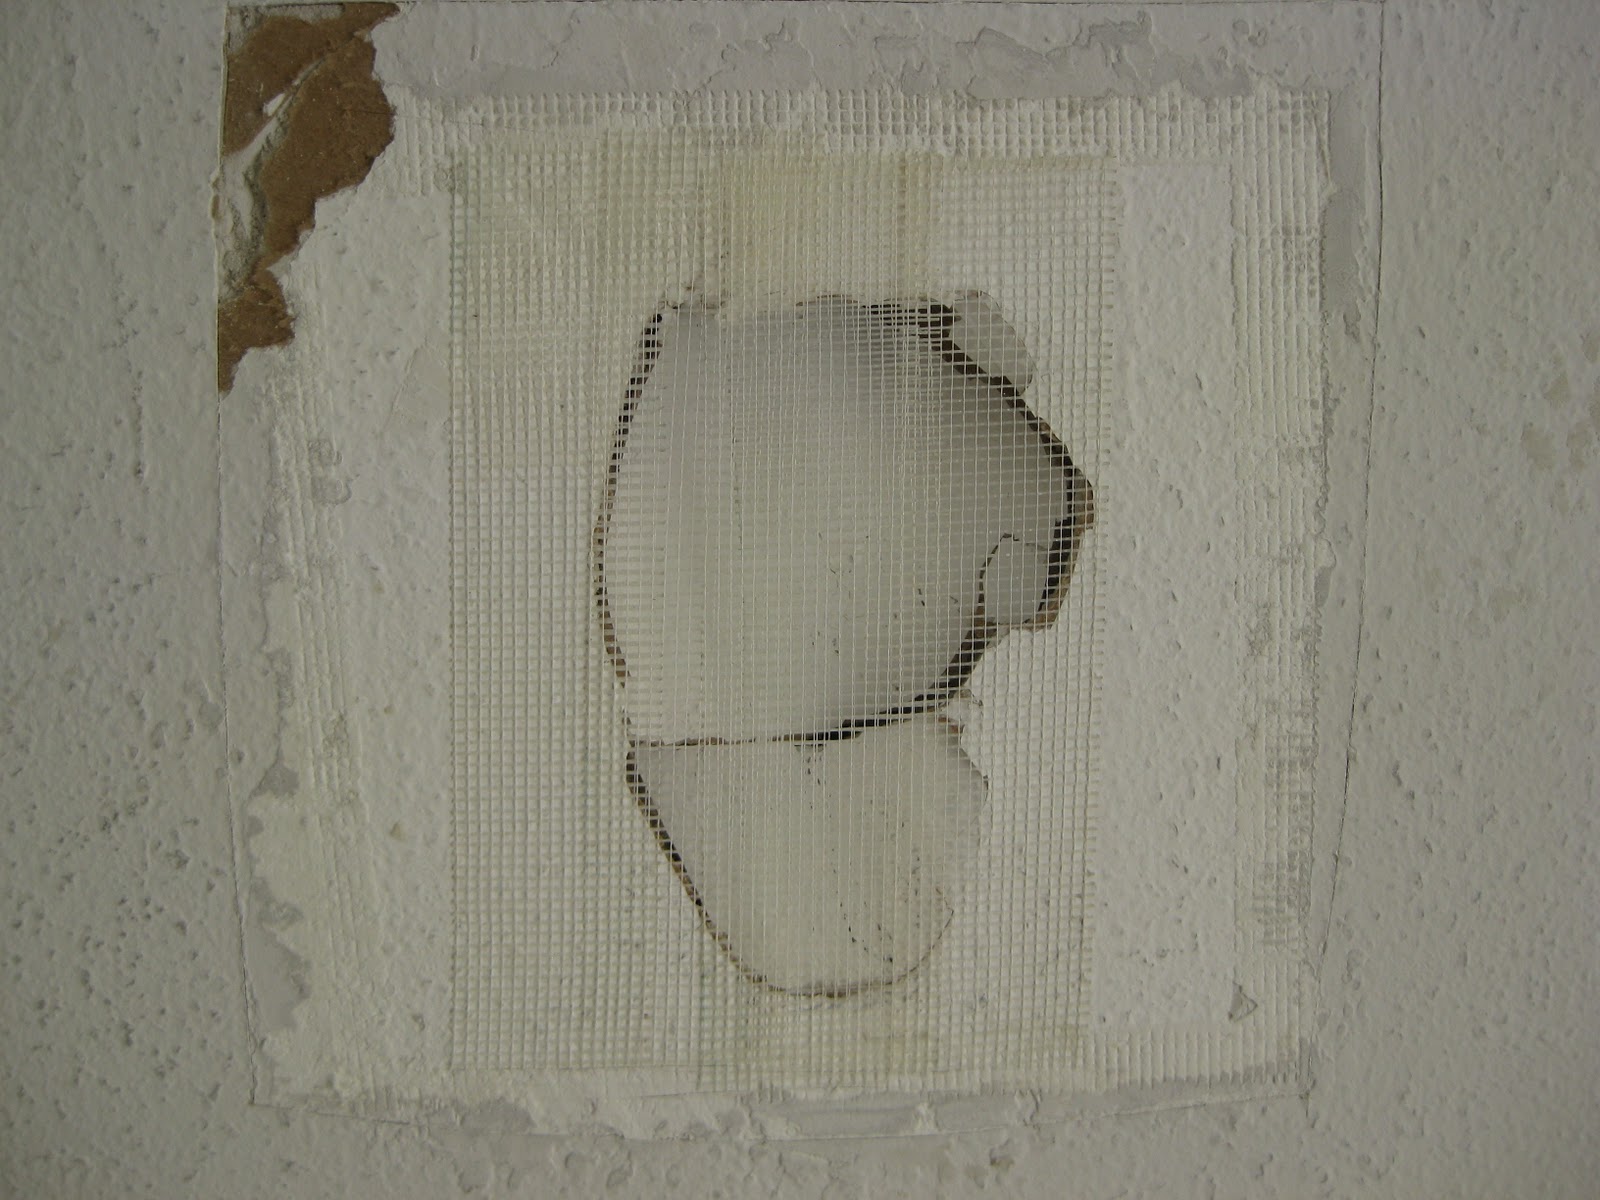
 Surprise! After cutting the outer area with a razor knife, there was a thin metal patch which was used to cover the hole. I will use mesh tape for this application and you will see why in the next photo's.

 Mesh tape was applied over the hole and on to the surrounding area for support. The mesh tape has an adhesive on it's surface and it makes it easy for it to stick to the wall.  I applied a few more strips in the center for more support.

Note: I used 20 min. compound mix for this project. If there is no time restraint you can use basic drywall compound. Apply small amount of compound. It's amazing how little goes a long way.
 This is the first application with 20 minute compound using a 4 in. compound blade. I applied a small amount to the area and lightly onto the mesh tape, over the hole. What I like about this application is the tape can be slightly pushed in to give you a concave area. This will keep you from over applying the compound like the first picture. The main thing here, don't over apply the compound on the mesh tape, keep it close. Try not to fill the hole in one shot. Let this completely dry.
Another coat of of compound was applied with a 6 in blade. Build up the hole so that it is level with the surrounding area. It may take another coat to get everything level. When the compound fully dries and you are satisfied go ahead and sand the area with 150 grit sandpaper.
I like to sand  the outer sides to feather them into the surrounding area, and then into the center.  Wipe the area clean with a damp cloth, when dry apply a water base primer with a 4 in. roller and a 1/2 in. nap.

In this final photo I applied the orange peal texture from a spray can. Try not to cover the area in one shot. Take a moment to see if you need more and apply again. To remove the excess, use a damp sponge before it dries. Spray slightly onto the outer areas of the patch going on the original wall texture, but be careful not to over do it. When texture is dry I applied a water base primer and when it dried, I applied latex finish coats with a 4 in roller 1/2 nap.

NOTE: Practice spraying the texture onto a piece of drywall or board before applying it to the wall. Most of these spray cans have a dial at the tip which enables you to increase or decrease the amount of coverage. Cover the floor, furniture and window treatments before spraying the texture. Protect your eyes and ware a dust mask. Follow all manufactures instructions. Take your time and have fun! If have any questions please -
Call 772-879-9678 or e-mail us at arrayofcolorinc@yahoo.com