Update your kitchen cabinets with some paint, patience and of coarse knowledge. Would you like to have these beautiful, dark, rich painted cabinets?
Well, you can! Follow the system I use and your on your way to having a professional look to your cabinets.
The photo to your left shows wood cabinets which where completely painted and new stainless door pulls were added. The color of the finish is almost black, like espresso. Here is a supply list of items which will be needed to complete your project. Clean rags - lint free, ammonia, plastic bucket, 1/4 in. nap mohair mini roller cover and roller, these rollers come in a package of two,
2 in. Chinex paint brush, 1 1/2in. Blue tape, vinyl spackle, small spackle blade, clean tarps to lay the doors on, 1 qt. of Benjamen Moore Advanced water borne alkyd paint, in the color of your choice, 1 qt. Stix water borne bonding primer tinted to the color of your choice or a med. to dark grey like the one shown below. A drill will be needed to remove all hardware. 220 and 400 grit sandpaper, vacuum and a dust mask.You may want to purchase de-glossing liquid ( instead of sanding ) ask your local paint supplier what product would be best for this situation.
Note: I used a SATIN finish for this project.
The first thing which happens to be very important is cleaning the cabinets thoroughly. A little water and ammonia and a clean rag will remove the dirt which has accumulated.
This step may have to be done several times.
Dry off cabinets and your ready for the next step.
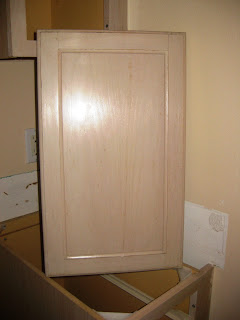
The photo on your left shows the original wood cabinet door.
This is a washed oak look and is begging for a change.
Put on your dust mask.
Take the 220 sandpaper and sand all areas to be painted.
Sand in the direction of wood grain. They sell de-glossing
liquid which will remove the original sheen and make
for a better surface to paint, if the sanding is to difficult.
When sanding is completed wipe down all areas
and vacuum any remaining particles.
If your changing the door and draw pulls fill all
holes with the vinyl spackle, let dry, sand smooth and wipe of any dust or vacuum.
Now your ready to apply the primer. Dip your brush into the primer ( mentioned above ) and paint into and along the stiles and rails of the back of the doors. Only a thin coat of primer is needed. Also we would like to keep any buildup of paint from getting in the corners, so pay attention to that.
When applying either primer or paint your brush strokes must be in the direction of the grain.
The only time that the stroke will be against the grain is when your brushing along the top and bottom of the rails. As long as there is a thin amount of paint applied to these areas there should be no cause for alarm.

Next, take your mini roller and apply a small amount of primer to the roller, enough to coat the roller but not dripping off the roller. This roller when used correctly will give a sprayed look to the finish. It is best to start at this point applying the primer thinly. This technique will be used threw the entire paint application.
While rolling, have an even pressure and roll from the top to the bottom to achieve a smooth finish. These rollers can hold a lot of paint so be careful. Check often to see if there is any excess of primer on the sides which needs to be blended in.
At this point we are concentrating on the backside of the doors. Let primer dry completely.
OK! your doors are completed on the backside and now the fronts are ready. Follow the same steps for the back.
While your waiting for the doors and draw faces to dry start priming the wall cabinets and the bases. Tape of any areas where you'll need to keep the paint off.
Use the 1 1/2 in. Blue tape. The wall cabinets and base cabinets will be cut in and rolled using the same rolling technique. The frames will also cut in and rolled as needed.
Now your ready to apply the top coat. Once again apply the paint with a Chinex brush and lightly paint the back of the doors as shown on the left. Apply a small even amount of paint along the sides of the stiles and rails. Then fill in that section with your mini roller going with the grain. Your roller should not be overloaded at any time.
Keep your strokes even with slight pressure.
Move with the grain. When the panel is completed move to the rails and stiles watching for any excess which flows over the sides.
Check for any dust which may of dried on the paint finish and sand off lightly with the 400 grit sandpaper. Wipe clean and apply another coat.
Two coats will be necessary to cover.
Here is a photo of the bottom side which I had painted and the top of the door on the hinged side. Later when both sides are dry I will hang the doors back on the cabinets and then finish painting the sides.
Once all coats have dried your ready to put the hardware back on and replace all the doors and draws.
Remember to read all product information on the label and be aware that sanding may emit lead dust in the air which is known to cause many health problems. Keep the work area ventilated properly. Keep safe.


