The amazing things you can acheive with paint !

Join me for an inside view of a painters world, a world filled with people, places, color and design. My painting company is a perfect platform to show you all the amazing things you can achieve with paint. There will be photo's, stories and DIY tips. From time to time I will throw in some of my art work.
Array of color inc specializes in interior, exterior painting and faux finishes. Our services areas are Indian River Cnty, St. Lucie, Martin and Palm Beach Counties. Call for a free estimate - 772-528-6365

Tuesday, April 30, 2013

Painted faux bricks


 Hand painted faux bricks bring the beauty of old world charm right into your room in any color, shape or size. There are so many areas in your home where bricks can be used to warm up your decor, the fireplace, kitchen, back splash, den, family room and so on.


 Hand painting the faux bricks gives you endless color options and styles. The photo above shows the bricks are exposed from the sheet rock, which has been a popular design treatment in resturants and homes. If you choose an entire wall can be painted, be creative!

How to do this project, check out this link http://arrayofcolorinc.blogspot.com/2013/03/faux-painted-bricks.html


Saturday, April 27, 2013

Emerald Green Glaze

Try this ragging technique using an emerald green glaze if your looking for a soft sophisticated finish with a lot of depth. Did you know that emerald green was named 2013 color of the year by Pantone. Add this award winning color to your walls. This faux finish is great if your walls have imperfection, it will help disguise them. The paint finish is achieved by using a positive and negative ragging technique on an eggshell sheen base coat.

The positive application of a glaze is achieved by applying glaze directly to a surface using a sponge, rag, brush or other tool. Each item used to apply glaze makes its own mark.

A negative application is removing glaze from a surface. In this case we used a damp cotton rag to move the glaze on the wall from one area to another. This technique is called "walking the glaze" as the rag is being moved around it is lifting off glaze leaving a negative mark and then reapplying the glaze in another area.

The glaze is first applied by a brush onto the wall leaving a small amount which will be manipulated with a damp rag. The rag will be placed in your hand by dropping the cloth into your palm producing a pattern in the cloth. This pattern will produce the marks which will be left on the wall.

The cotton rag must be turned in many different directions to create a random pattern.Working the glaze in small sections at a time resembling puzzle pieces will produce a smooth flow threw out the area. Blend each section into the previous area.

Work the glaze into the corners by rapping the rag around your pointer finger and walking the glaze towards the edges. This works well by keeping the glaze from being over applied into the corners.

Note: I recommend a practice board before tackling your walls so you can work out any issues which may arise. Use a glaze mixture of 1 part paint to 3 parts glaze.
When your cotton rag is saturated with glaze rinse lightly in water and ring out till damp.
Wear rubber cloves


Friday, April 19, 2013

Ideas for Accent Walls

Here are some ideas for painting accent walls that may inspire you to move forward and create a fascinating area in your home. Ideally an accent wall is used to bring interest towards an area, to enhance objects, furniture and artwork. Just adding a single color to an area will change the dynamics of the space.
The photos below are just the beginning of what you can achieve with paint. There are endless painting techniques which will make your accent wall unique and stand out in a cookie cutter world.


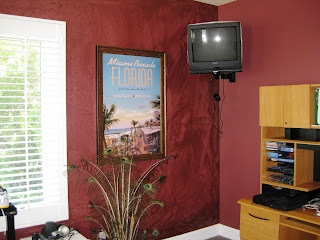
 Solid brick red adds to conversation and appetite, you'll see this color in restaurants,dining rooms and kitchens. If you ask me, red looks great in many areas.
                             
                                         Dare to be different! Add a distressed wall


                                 Ragging technique, lighter glaze over a darker base
 
                                      Distressed stripes add a whimsical feel   


                                              Tone on tone smooshing technique    
           
                                   Accent color taken from fabric, smooshing technique    

                                        Add painted moldings to enhance an area
                         
                                              Sponging technique using glaze

                                                        Faux inside a frame

                                                    Sponging over a light base
                                                          
                                              Multi  framed in areas faux painted                 

                                                            Distressed strie


                                                    Create a distressed faux brick wall     

                                     
                                               Metallic Blue painted wall, crosshatch technique

Monday, April 15, 2013

Crosshatch Faux Technique


A crosshatch faux technique was used to create this subtle aged look. This technique can be used on the interior and exterior. To accomplish this look, paint is applied wet on wet. I applied a deep warm green and a mid warm green on a lighter cooler green base. The base and top coats were a eggshell finish . No glaze was added to the paint. A 4in. roller was used to distribute the darker green first, then a 3 in. brush was used to apply  the mid tone green using the crosshatch technique. I applied the the mid tone green in a random pattern with the same brush. The cross hatch was softened and the edges of the faux were kept in a irregular pattern. The end result will have a soft mottled appearance.

Note - With the Crosshatch technique you are basically painting X's on the wall and blending the two colors together.
 I moved right along, cutting in top and bottom,
rolling in the opened areas. Try not to let the outer edges of the paint dry. Work a couple of feet at a time and dont add too much paint into your corner. This would create a pie crust look. To avoid this, I make a point of adding paint or glaze several inches from any corner and slowly bringing the paint or glaze to the corner.


 The greatest thing about this technique is, it is easily repaired. Go back into the area and follow the above, blend in the area and your finished. If this is your first attempt, choose colors which are various tones of the same color. This will keep you from adding other colors which may make an  unwanted color. For the more experienced colorist, use your imagination.  Enjoy!


Saturday, April 13, 2013

Repair Painted Dresser


 This beautiful piece of furniture was going to be thrown out, until the owner contacted me to see if I could repair the painted dresser. This piece of furniture has been in her family about 50 years, there are several pieces that were split up between family members and the thought of loosing it was heart breaking. This hand painted, faux painted Bombay style dresser was originally made by the White Fine Furniture Co., purchased in New York City. There is a beautiful oriental scene on the entire front of the dresser and it flows onto the sides. What I loved about this nine draw piece was its size was unobtrusive, the color and the art work was not overwhelming.

So, what happened? Incense oil spilled out and over the top of the faux finish, melting away layers of paint, right down to the wood. The spill measured around two and a half feet,  several areas had quarter size holes in the finish. As you can see, it was pretty bad.


 The first thing I needed to do is to clean off any residue from the dresser top, sand the entire top with 180 grit and then apply a patching compound to level out the damaged areas.


The compound was sanded smooth with 180 grit and leveled off, dust was vacuumed and wiped with a damp cotton cloth. I primed the entire dresser top and when dried, sanded lightly with 220 grit. I then applied two coats of the base paint, which was a latex eggshell finish. After the first coat of paint was dry I went over the the top with 220 grit to knock of any dust particals. To apply the primer and finish coats I used a mohair mini roller with a 3/8 in. nap. This roller nap is fantastic for a quality finish.


         Finally, the top was faux painted to match using a dry brush application to create a subtle wood grain. Then a light splattering was added. The protective finish coats of urethane was applied using the mohair mini roller with a 3/8 in nap. Each coat of urethane was lightly sanded with 220 grit, wiped clean before appling  the last coat of satin finish.

 I was happy that I could save this furniture from being thrown out, but then you know that old saying, one person's trash is another's treasure.


Monday, April 8, 2013

Easy Painted Stripes

Here is an easy way to paint stripes, eight inch stripes with alternating colors and slightly distressed. No tape will be used to paint the stripes. This project could be used for an accent wall or the entire room.

 First prep your area and apply blue tape to the base boards or as needed. Measure the wall where the stripes will be painted, divide the width of the stripes you would like to have into the total length of the wall. Example: 192 inches ( 16 ft ) divided by 8 inches = 24 stripes. If you end up with a odd number divide that number into your total stripes. So in this case your stripes could be 8 1/8 inches each.

Next, make a small mark to the top and bottom of the wall where each stripe will be, move from one
end of the wall to the other end. Mark every other stripe which will be the different color, I use a small piece of blue tape.


Take a 4 ft. level and place it on the mark of your stripe. Use a 2 1/2 in. paint brush with the first paint color ( no glaze ) and brush up against the level running vertical on the wall. Continue down the wall with the level ensuring it is plum.

Your creating a guide line for your stripe, keep from overloading paint on your brush.

Wipe the excess paint from the level and move to the other side of the stripe. This process will continue for every other stripe till you get to end of the wall.
Fill in each stripe with your first color ( light beige ), the stripes shown were painted over a golden tan base, let some of the base show threw.

 Now apply the second color ( yellow ) to the next group of stripes using a dry brush working with vertical strokes. The wall should look like its almost completed. These stripes can be cut in, the level does not have to be used.


Once all the yellow stripes have been painted  add yellow brush marks to the lighter stripes.


Add the lighter color to the yellow stripes. Finally, add an off white with a brush to each
stripe randomly to produce high lights.


Note: There are four colors used to produce this technique. Choose a light, med and darker color. Flat paint was used for this project.

Base: Benjamin Moore # HC-9
Light stripes - BM # 226
Yellow Stripes- BM # 270
Highlight - mix 1 part HC- 9 with 3 parts white
The fourth color is used to high light. The base coat the darker color, the light stripe a beige tone and the other stripe a yellow.


Sunday, April 7, 2013

Painting Accent Walls

Painting accents walls does not have to be so complicated, once your focal area wall has been chosen add a splash of color and your on your way to liven up a room.
Choose a color from fabric in the room or use your favorite color and add it to your accent wall. Just by introducing a new color to the area produces a whole new feeling.
The photo to the left shows an accent wall where the color was taken from the bed cover. To bring it up a notch a faux finish was added to give more interest.

The photo on the right shows an accent wall useing the same base color as the surrounding walls, a faux finish was used to accentuate this wall.

Both photos show accent walls which were faux painted using a smooshing paint technique.

The smooshing technique is done by applying a satin finish to the wall, dried fully and then apply a glaze over the satin finish. A large plastic sheet is applied over the glazed area, move your hands over the plastic and then remove the plastic from the wall. By removing the plastic sheet you will
notice many different lines in the glaze producing an instant design pattern to a once solid color wall.

Having another person to help with this project will make things go a lot smoother. Have enough plastic to cover the whole wall. You will need to work fast when applying the glaze. The color glaze should be a few shades darker than the base color. The glaze mixture should be 1 part paint to 3 parts glaze. Use a brush and roller to apply the glaze. Cut in and roll the wall from one end to the other before the glaze sets up. If its a large area the wall can be broken up in sections but leave a wet edge untouched for the following section.

Note: This project could get messy so tape off your base boards and any other moldings, have drop cloths in your work area. When rolling the glaze onto the wall use a 1/2 in nap and keep from overloading the roller.


Saturday, April 6, 2013

Faux Painted Metal Garage Door


A faux painted metal garage door is a great way to achieve the look of beautiful stained wood. There are so many colors to choose from and many combinations of design. Most metal doors have a grain pattern embossed into the metal which runs horizontally across each panel. By having the grain running in one direction makes the job a lot easier, there is no taping off each piece of wood going in opposite directions for this project shown above.

The metal garage door was previously painted so I pressure washed it prior to painting.  I applied   the base coat, Benjamin Moore # 1110 exterior latex paint in satin finish with a brush and roller.
When the base coat has fully dried apply the glaze mixture of 1 part  BM - Charleston Brown exterior latex satin finish with 3 parts of glaze.  A 3 inch brush was used in the direction of the grain.

Start at the top most panel and work from one side to the other. This glaze application gives the door the different variations of undertones in wood. Let the base show threw in some areas and apply the glaze heavier in others. Once the first top panel is completed move onto the next panel and continue.
As your glazing the door glance at the other panels so you don't repeat the same variations.

The final glaze which is a darker brown is applied starting again at the top and working from one side to the other. This application will add deeper wood grain. Again, let each section have its own personality to add interest to the door. The darker glaze will also be applied lighter in areas and darker in others.

Take a look at a piece of real wood and try to duplicate the grain pattern.


Thursday, April 4, 2013

Painted Bath Room Cabinets

Painted bath room cabinets can give a whole new life to dated cabinets and save money too.. These cabinets were once bare and the original finish was badly worn, adding new stainless door and draw pulls gives that finishing touch. The espresso satin paint finish complements the contemporary design.
Two matching mirrors take the place of a wall to wall mirror which overwhelmed the area.
If you would like to paint your cabinets please visit the following link... http://arrayofcolorinc.blogspot.com/2013/02/paint-kitchen-cabinets_17.html

 This project will take a few days but can be very rewarding. Remember to take your time with each segment from cleaning to the finish coat.
To make your darker painted cabinets pop add a lighter color to the surrounding walls which in this case was a peachy beige. 
We spend a good part our lives in the bath room so why not make it a special place.