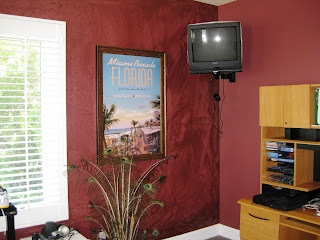
Choose a color from fabric in the room or use your favorite color and add it to your accent wall. Just by introducing a new color to the area produces a whole new feeling.
The photo to the left shows an accent wall where the color was taken from the bed cover. To bring it up a notch a faux finish was added to give more interest.
The photo on the right shows an accent wall useing the same base color as the surrounding walls, a faux finish was used to accentuate this wall.

Both photos show accent walls which were faux painted using a smooshing paint technique.
The smooshing technique is done by applying a satin finish to the wall, dried fully and then apply a glaze over the satin finish. A large plastic sheet is applied over the glazed area, move your hands over the plastic and then remove the plastic from the wall. By removing the plastic sheet you will
notice many different lines in the glaze producing an instant design pattern to a once solid color wall.
Having another person to help with this project will make things go a lot smoother. Have enough plastic to cover the whole wall. You will need to work fast when applying the glaze. The color glaze should be a few shades darker than the base color. The glaze mixture should be 1 part paint to 3 parts glaze. Use a brush and roller to apply the glaze. Cut in and roll the wall from one end to the other before the glaze sets up. If its a large area the wall can be broken up in sections but leave a wet edge untouched for the following section.
Note: This project could get messy so tape off your base boards and any other moldings, have drop cloths in your work area. When rolling the glaze onto the wall use a 1/2 in nap and keep from overloading the roller.

No comments:
Post a Comment